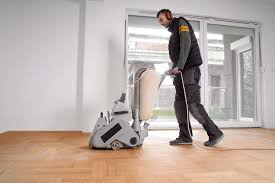
Do you feel that your timber floor has lost its polish and shine? Has it started looking dull and decrepit? Sanding your timber floor can actually give it a facelift and can completely alter the aesthetics of your home. The following are some simple tips from the experts at timber floor sanding Brisbane to help you along.
Preparing the floor
The first step in sanding your floor is to prepare it in the right manner. Be on the lookout for the nails sticking out of the surface of the floor. You would need to ensure that the nail isn’t caught by the sandpaper and rip it apart. All the nails sticking out of the timber floor should be hammered down and the surface should be smoothened. The holes in the floor should be covered by putty. Preparing the floor is the first step in ensuring that the sanding process is carried out as smoothly as possible.
Tools required for floor sanding
You would need the following tools before you start the sanding process
- A drum sander
- Detail sander
- A mask to protect your face
- Ear muffs for protecting your ears
- Safety eye wear
Once you have got everything at hand, you should start the sanding process. The first step would be to open the floor sander and make sure that you tip the machine towards the side. Make sure that you start at the lowest grit. Starting with grit sandpaper is a good idea. As you progress you can slowly move towards the finer grit for the final finish. Slide the sandpaper into the drum. Keep in mind that you would have to frequently change the sandpaper. The experts at timber floor sanding Brisbane suggest that you go slowly and keep checking the situation of your sandpaper instead of just charging ahead.
Whenever you begin the process always make sure that you start with the center of the room. Make sure that you keep the center moving with even and constant stroke. The smooth motion would enable a smoother finish instead of the jerking movements which might actually ruin the look of the floor. It is advised to move along the grain while going both up and down.
If you are about to make a turn you need to pull the drum back up otherwise you might risk putting scars on the floor. After every sanding process it is important that you get rid of all the layers of dust using your vacuum cleaner. This will make cleaning up much easier before the coating process and would also ensure your safety and comfort.
When you are done with the floor you might want to switch the drum sander for a edge sander. You should be careful when sanding the edge of the floor, it should be at the same gradient for a professional looking finish.
When the sanding processes is over you would need to carry out thorough cleaning to get rid of all the dirt so that the floor is prepared to take in the polish.


